
Getting Started 🚀
If you've made it this far, you've probably already jumped into Hanover! We're so glad you're here. Check out the links below to find everything you need to start navigating Hanover.
Setting Up Your Brand Colours & Logo 🎨
When logged in as an admin;
Click on 'Admin' in the menu
Scroll down and click on 'System Settings' from the submenu
Hint: If you can't see the 'Admin' option, it's likely that you're browser is zoomed. Please zoom out to see the option.
A side panel will slide in where you can see 'Upload your logo'
Click 'Choose File', select your logo and hit 'Save'
Use your mouse to crop your uploaded image to the right size
Click 'Save'
Congratulations you've just uploaded your logo 🥳
How to set your brand colour on Hanover 🌈
When logged in as an admin;
Click on 'Admin' in the menu
If you can't see the 'Admin' option, it's likely that you're browser is zoomed. Please zoom out to see the option.
Scroll down and click on 'System Settings' from the submenu
Next to 'Brand Colour', enter the HEX code for your companies brand colour.
Click 'Save'
Congratulations you've just set your company brand colour 🎉
Creating your first program ☑️
Inside Hanover, you can create complete and custom application forms for your programs that gather all of the information and documentation you need to process an application.
When logged in as an admin;
Click on 'Programs' on the menu.
This is where all of your programs will live when after you have created them.
Click 'Create A New Program'
Enter your program details;
Program Name - participants, hosts and partners will see this program name.
Program Description - participants, hosts and partners will see this program description.
Program Type - select what type of program this is.
Review Period - the amount of time a host can have a participant on review for.
Prevent Sign-ups - allows you to toggle whether participants can self sign-up to this program or not.
Click 'Create'
Congratulations you've just created your first program 🚀
How to add/edit a program application form 📑
When logged in as an admin;
Click on 'Programs' in the menu
Find the program that you want to add/edit the application form for
Click 'Manage Questions'
Congratulations, you now know where to add/edit application forms 🥳
Program application forms inside Hanover work in exactly the same way that application forms work in real life. They are made up of different sections where you can ask questions.
Here's what the structure looks like;
An application form is made up of multiple sections.
Each section is made up of multiple subsections.
Each subsection is made up of multiple question fields.
Sections 📋
In order to add a section to your application form;
Click on 'Add Section'
If you've created a section previously, you can select it again from the 'Existing Sections' dropdown. For this guide, we will be creating a brand section, so click 'Create a New Section'
Click 'Create a Section From Scratch'
Give your section a name and hit 'Save'
Nice work! You've just created your first form section.
Now that you've created the section you'll see this:
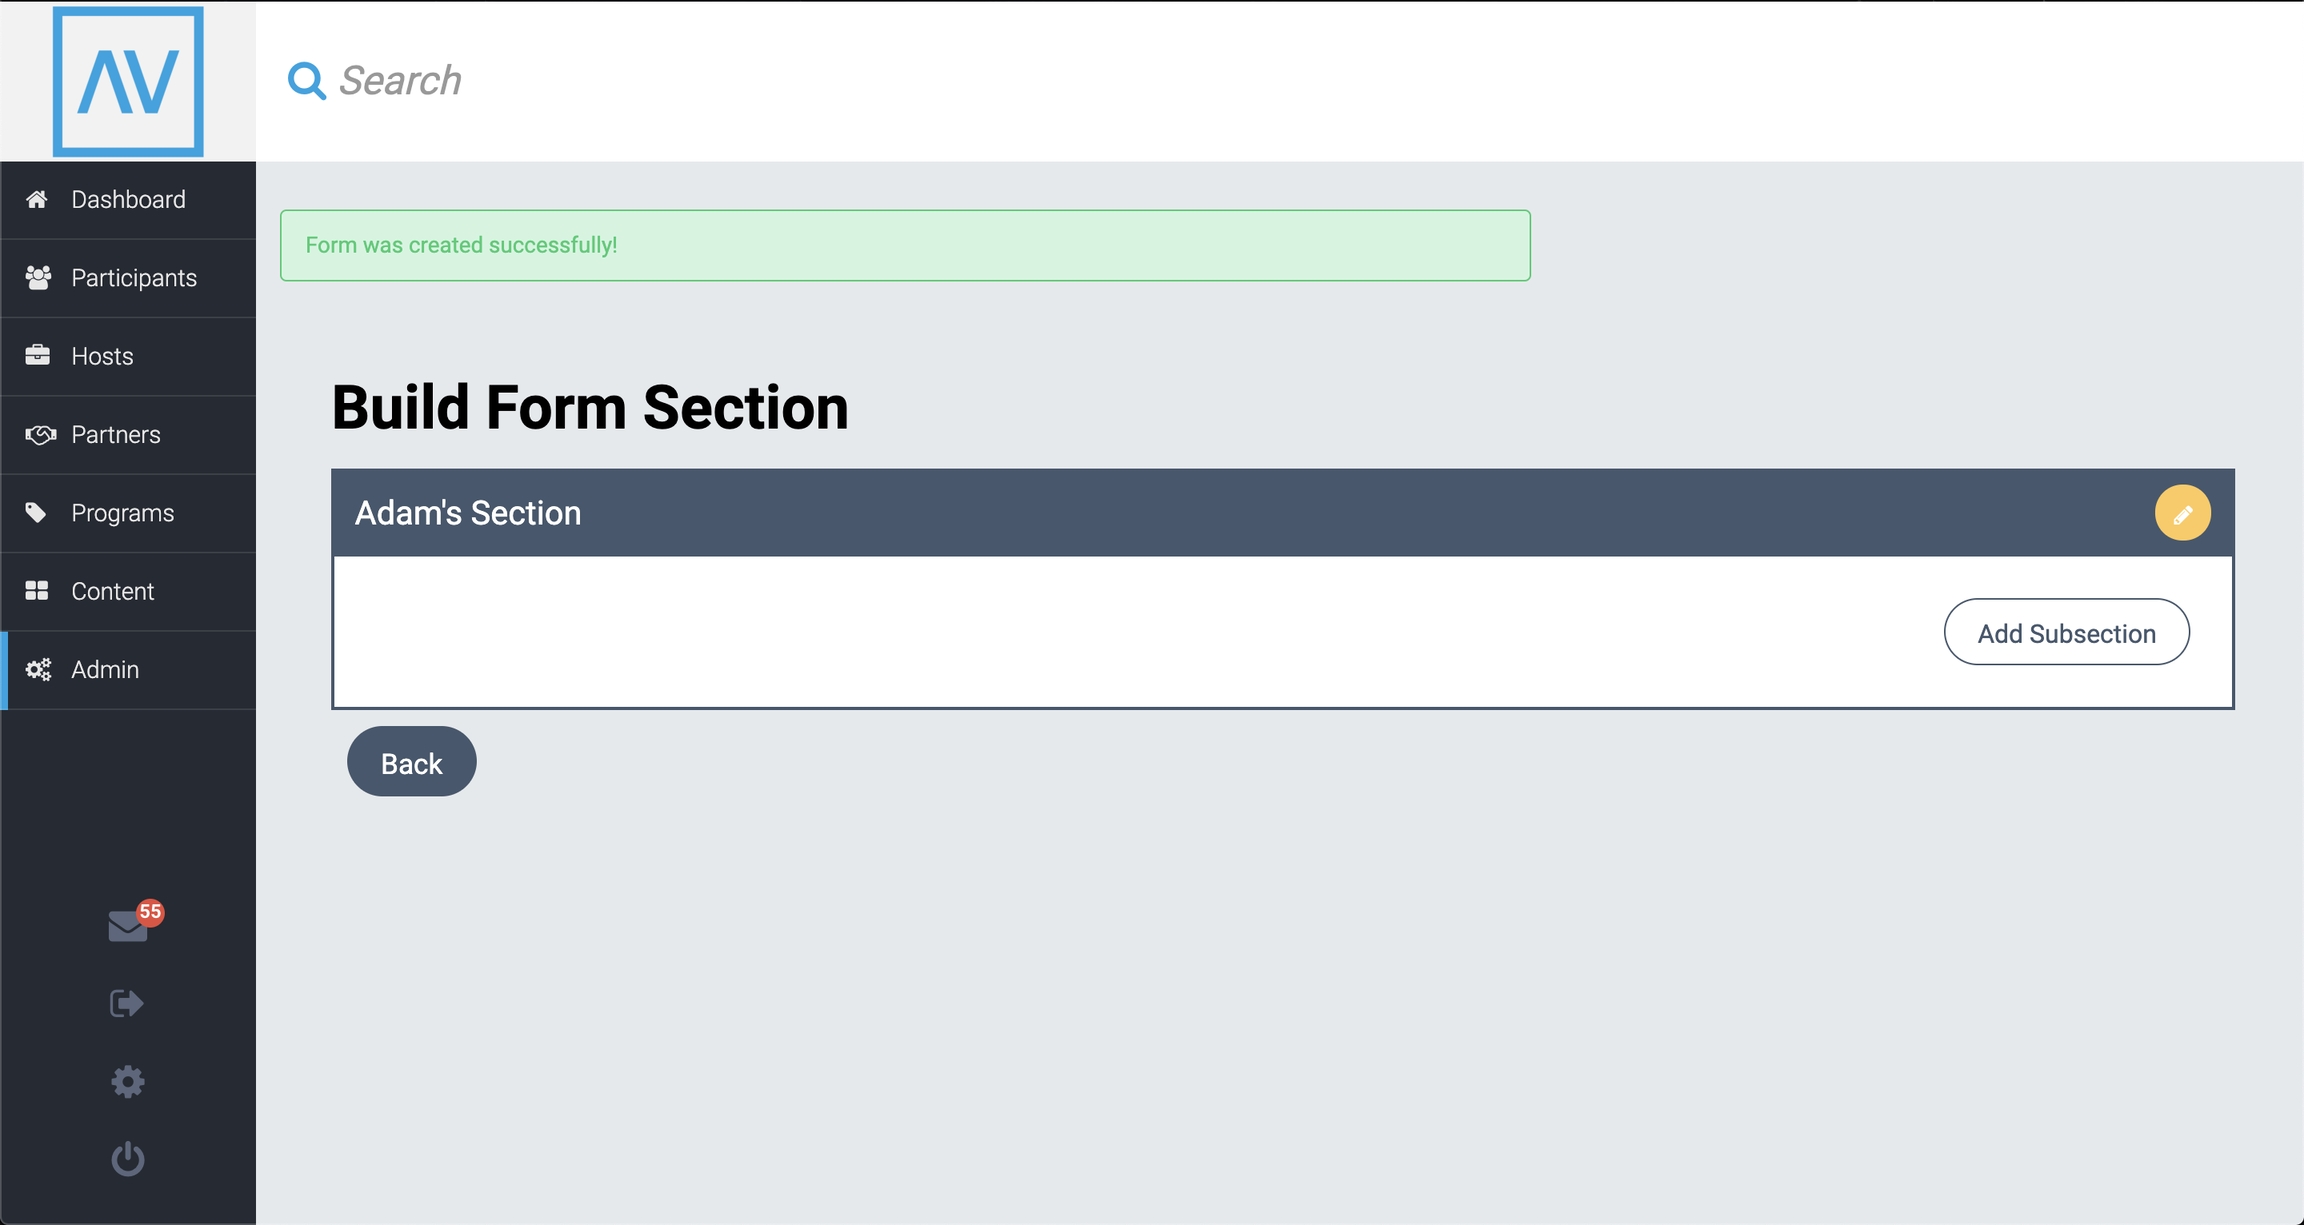
Your form section is empty at the moment, so let's continue to add some subsections and questions.
Subsections 🗂️
Next, we need to add a subsection. Subsections allow you to split sections into smaller subsections so that you can make group your questions in a way that makes sense to your participants. You always need a minimum of one subsection and there is no maximum.
To add a subsection;
Click on 'Add Subsection'
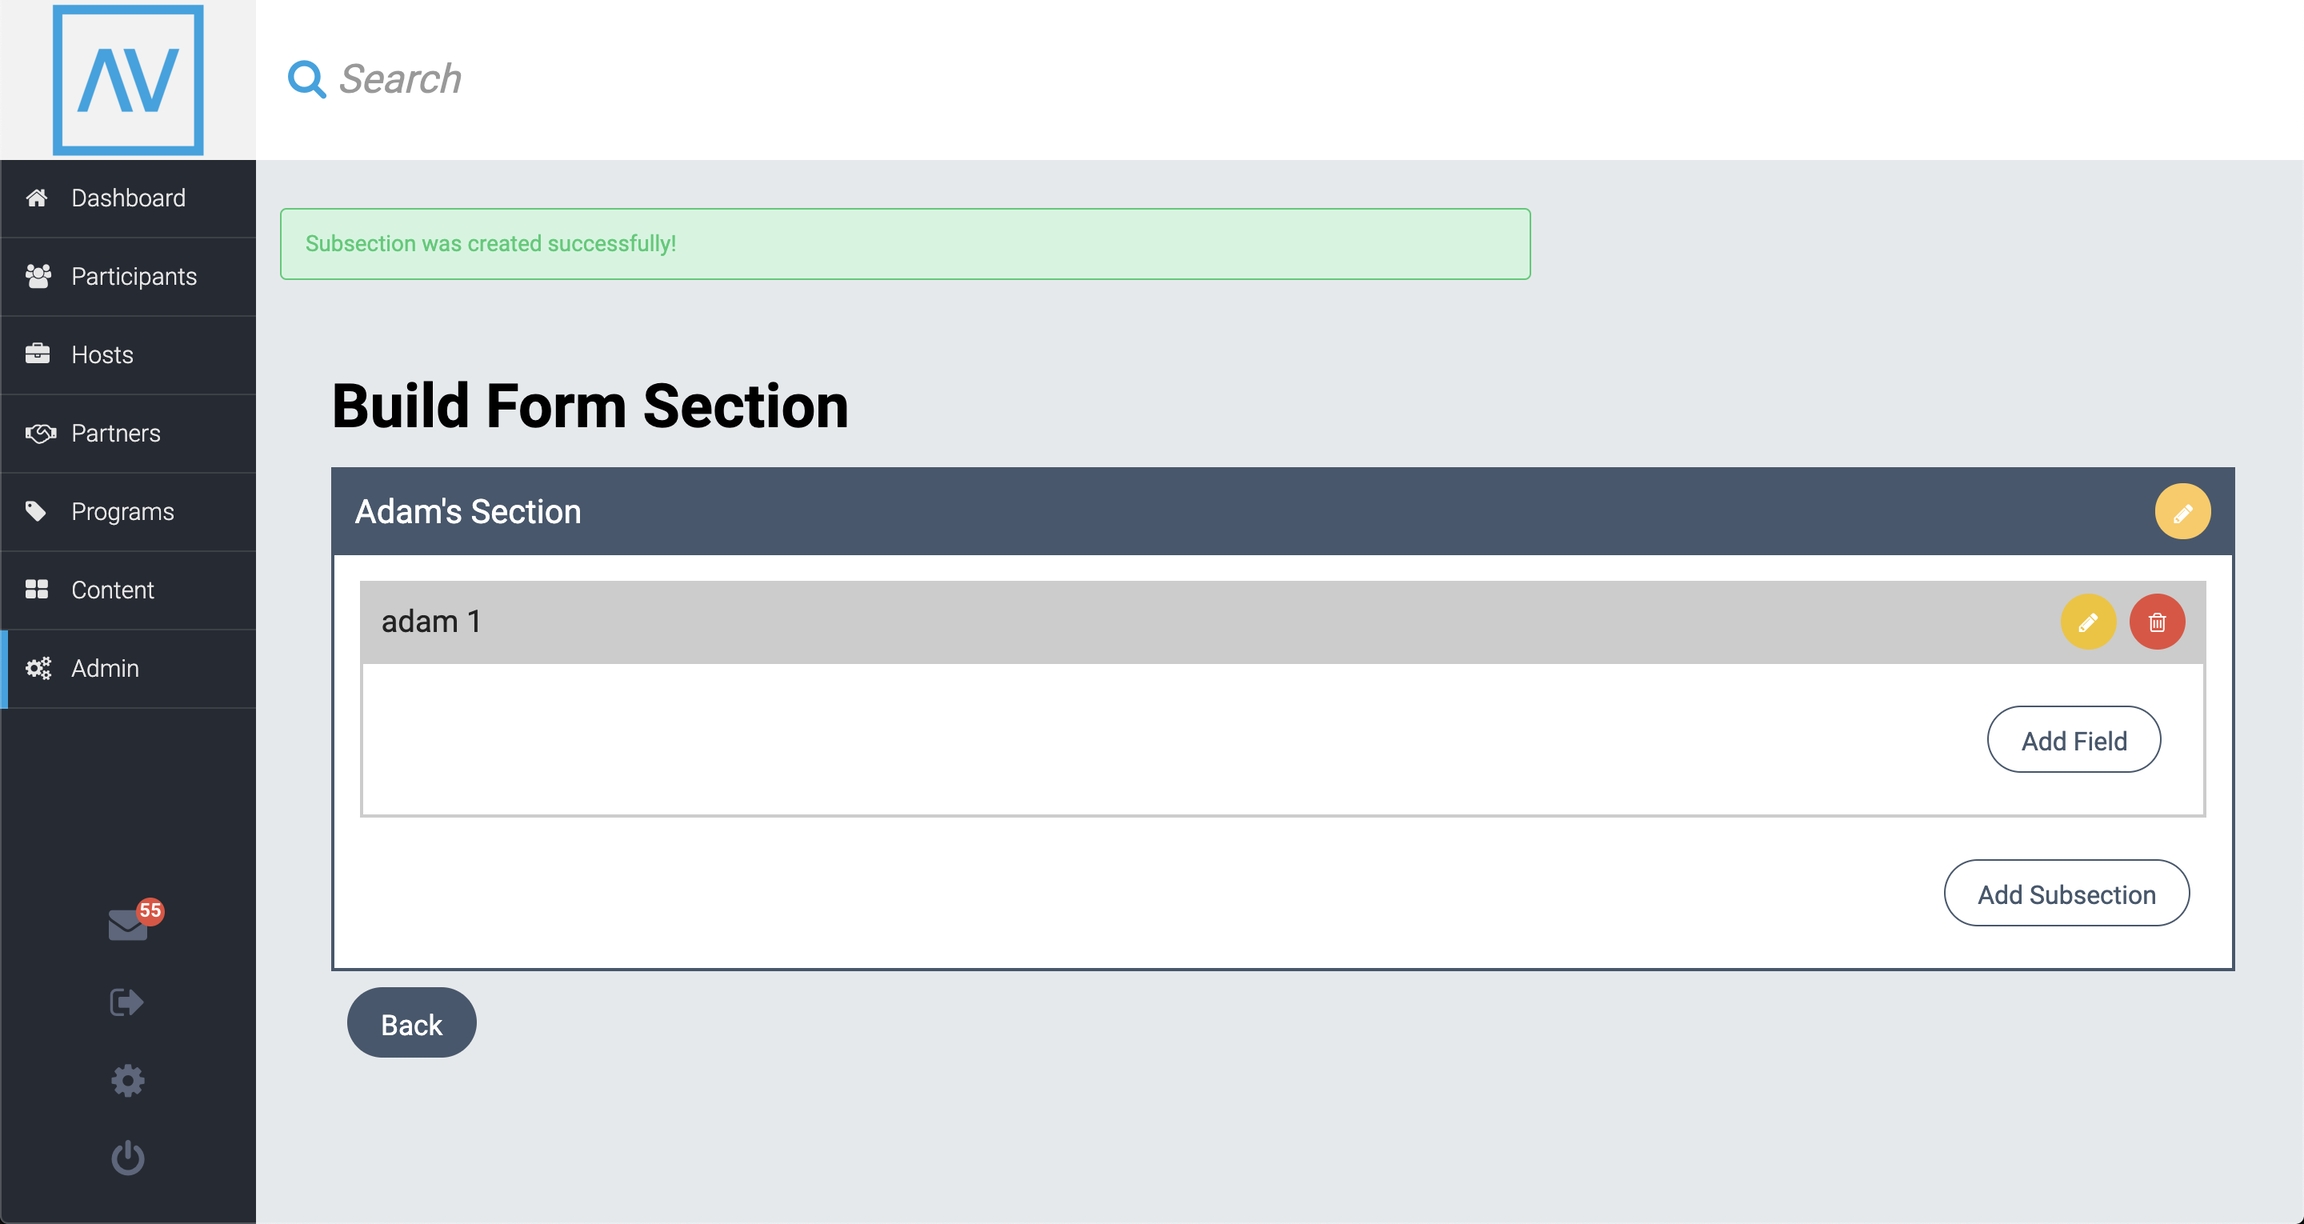
Give your subsection a name and click 'Save'
You can create additional subsections by clicking 'Add Subsection' again.
Now that you've created the subsection you'll see this:
Fields/Questions 💬
Next, we need to add questions to our subsection. Inside Hanover, questions are known as 'Fields'. Let's add some now.
To add a field;
Click on 'Add Field'
Type your question. Hanover will automatically search for previously created fields that match and you can add it to the subsection. If your field does not exist yet, click on 'Create New Field'
Select your field type
Select whether this field is required or not
Click on 'Create Field'
Great! You just added your first question 🚀
Creating a Participant 🧑
As an Admin, you can create Participants directly in your Hanover. You can also direct Participants to apply for your program themselves.
When logged in as an admin;
Click on 'Participants' in the menu
Scroll down and click on 'Create Participant' from the submenu
Enter the Participants information and select which program they will be on.
Selecting 'Invite Participant' will send an email to the Participant's email address you enter above prompting them to log into the Participant Portal and create a password for their account. This is great if you want the Participant to complete the application form themselves.
Click 'Create Participant' when you're finished
You'll then be redirected to the new Participants profile page
Creating a Host 🧑
As an Admin, you can create Hosts directly in your Hanover. You can also direct Hosts register themselves.
When logged in as an admin;
Click on 'Hosts' in the menu
Scroll down and click on 'Create Host' from the submenu
Enter the Hosts information, upload a logo/profile photo and select which programs they will be associated with.
Click 'Save' when you're finished
You'll then be redirected to the new Hosts profile page
Congratulations you've just created your first Host 🎈
If you'd like to give this Host access to the Host portal, you'll need to create a user on the host profile.
How to add/edit a Host application form 📑
Inside Hanover, there are three different Host types:
Host Camp
Host Business
Host Family
Each different Host type can have a different and custom application form and required documents.
When logged in as an admin;
Click on 'Hosts' in the menu and then 'Host Forms' from the submenu
Find the Host that you want to add/edit the application form for
Click 'Manage Questions'
Congratulations, you now know where to add/edit application forms for Hosts 🥳
Host application forms inside Hanover work in exactly the same way that application forms work in real life. They are made up of different sections where you can ask questions.
Here's what the structure looks like;
An application form is made up of multiple sections.
Each section is made up of multiple subsections.
Each subsection is made up of multiple question fields.
Sections 📋
In order to add a section to your Host application form;
Click on 'Add Section'
If you've created a section previously, you can select it again from the 'Existing Sections' dropdown. For this guide, we will be creating a brand section, so click 'Create a New Section'
Click 'Create a Section From Scratch'
Give your section a name and hit 'Save'
Nice work! You've just created your first form section.
Now that you've created the section you'll see this:
Your form section is empty at the moment, so let's continue to add some subsections and questions.
Subsections 🗂️
Next, we need to add a subsection. Subsections allow you to split sections into smaller subsections so that you can make group your questions in a way that makes sense to your Hosts. You always need a minimum of one subsection and there is no maximum.
To add a subsection;
Click on 'Add Subsection'
Give your subsection a name and click 'Save'
You can create additional subsections by clicking 'Add Subsection' again.
Hanover Tip - you can drag and drop subsections to change the order they appear.
Now that you've created the subsection you'll see this:
Fields/Questions 💬
Next, we need to add questions to our subsection. Inside Hanover, questions are known as 'Fields'. Let's add some now.
To add a field;
Click on 'Add Field'
Type your question. Hanover will automatically search for previously created fields that match and you can add it to the subsection. If your field does not exist yet, click on 'Create New Field'
Select your field type (learn more about Field Types)
Select whether this field is required or not
Click on 'Create Field'
Great! You just added your first question 🚀
Creating a Host User 👾
When logged in as an admin;
Navigate to a Host profile that you would like to add a Host User to
Click on the '+' icon in the 'Users' panel

Enter the Host User's information
Select 'Send an invite link to this person?' if you would like to invite this user to use the Host portal.
Click 'Add User' when you're finished
Congratulations you've just created a Host user 🎈
In this article, we'll teach you how to create a placement between a Participant and Host 🤝
Creating a placement 🍻
When logged in as an admin;
Navigate to a Participants profile
Scroll down to the Placement panel and click the '+' button
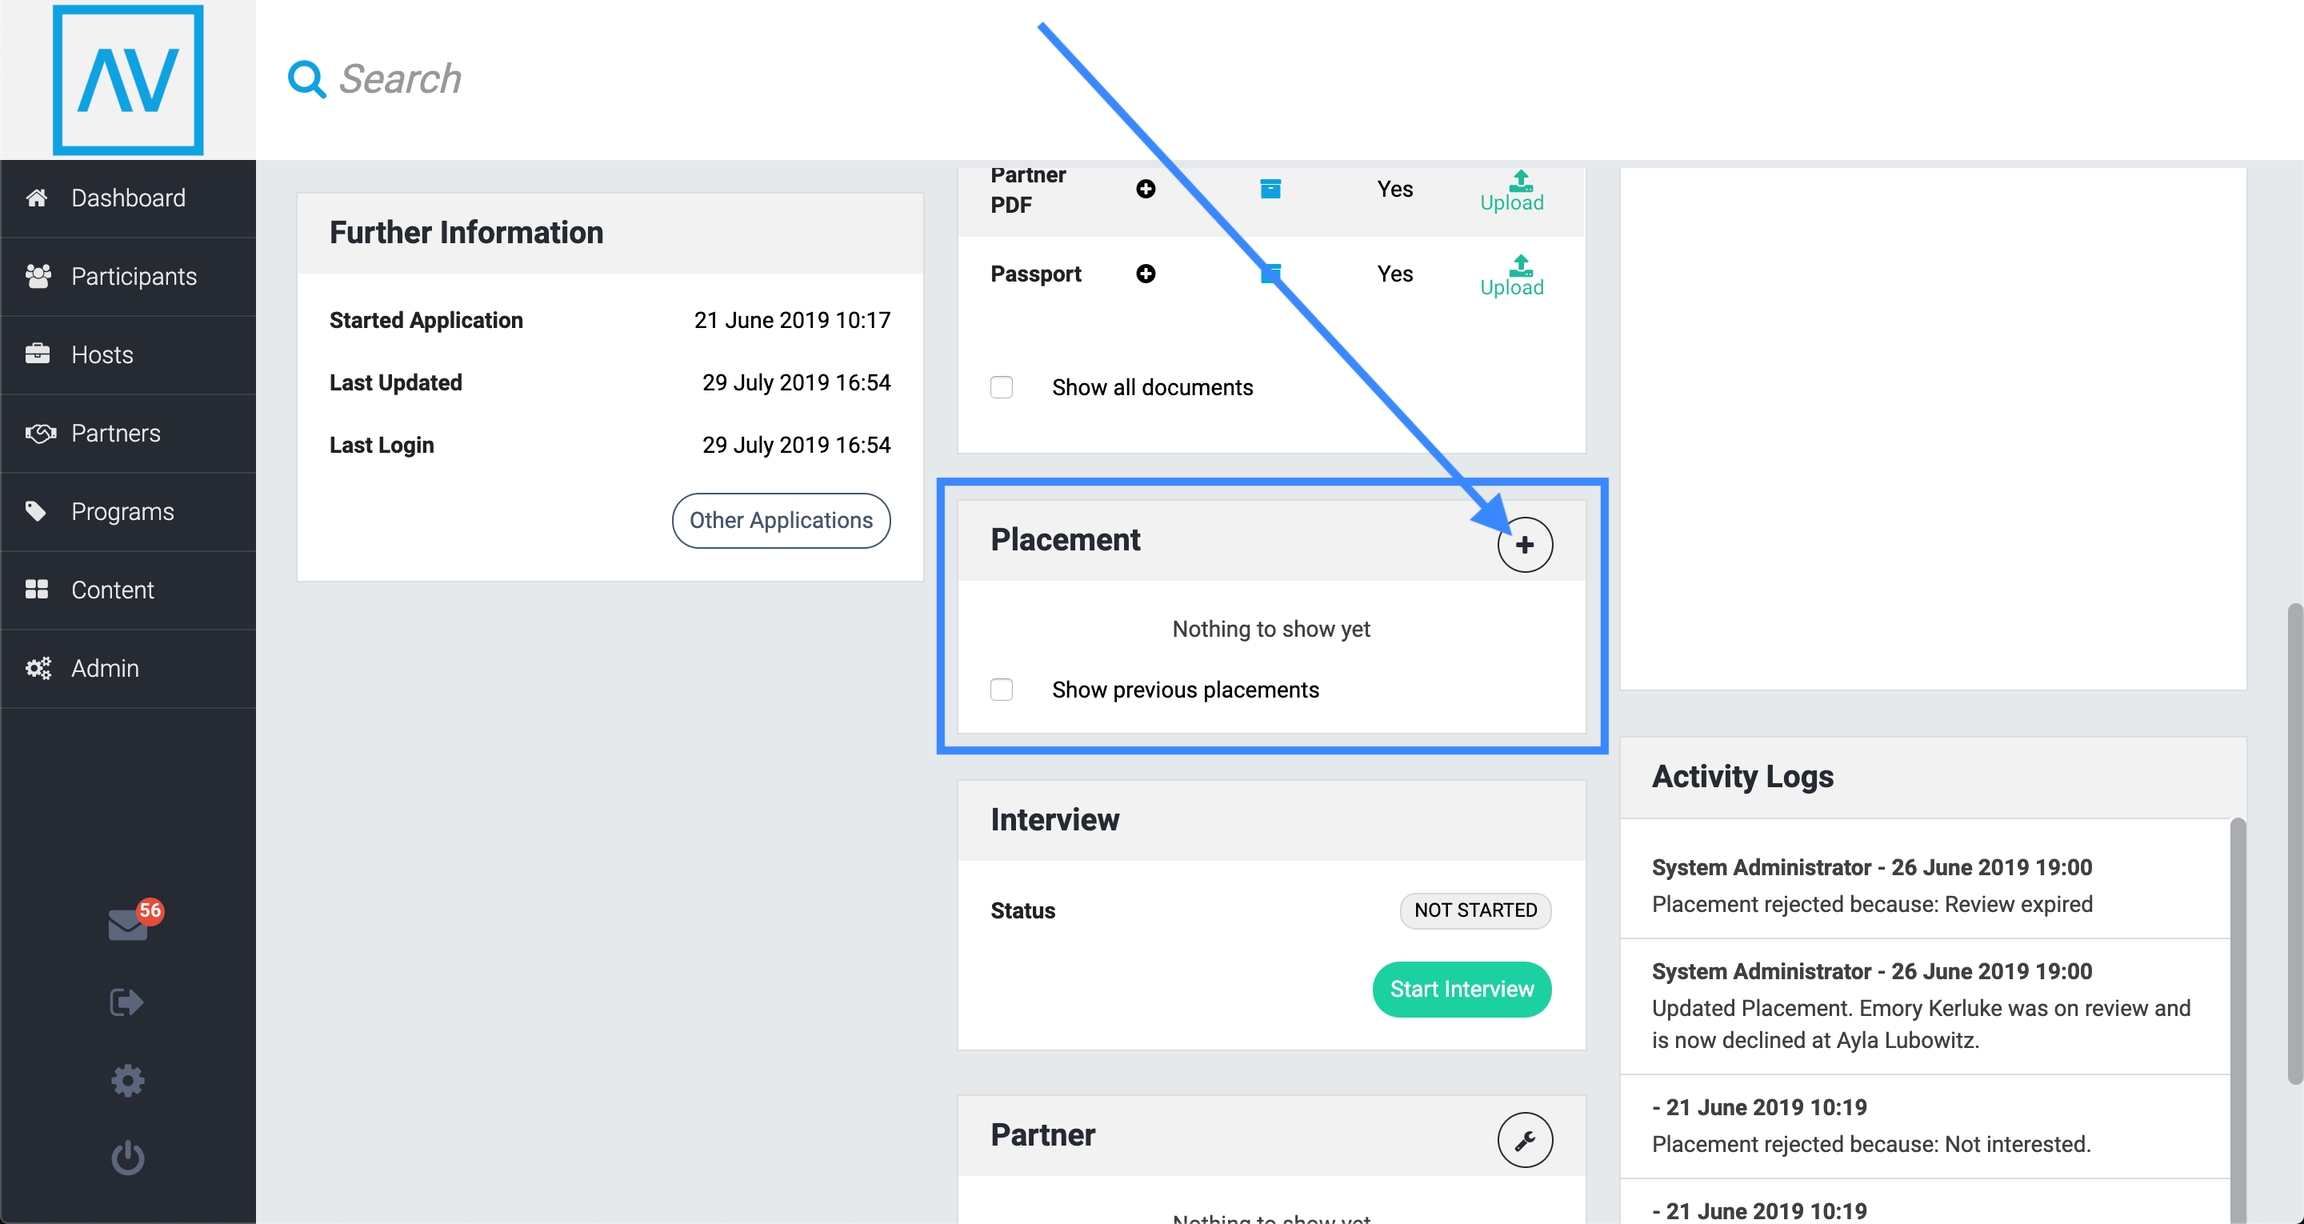
A side panel will slide in where you can select a Placement Status. Learn more about placement statuses.
Choose which Host you would like to create a placement with
Set the 'Review Expires' date. Learn more about expiring reviews.
Congratulations you've just created your first placement 🥳
You can now edit and delete this placement from the placement panel on both the Participant and Host profile pages.
Last updated
Was this helpful?