
Exporting Data
In this article, we'll be showing you how to export your data as a CSV file as well as control the data that is included in the export.
Export As CSV 💾
In this example, we'll so you how to export participants application data. You can follow the same steps to export Host data too.
When logged in as an admin user;
From the menu, click 'Participants' and then 'All Participants'
Use the filters to get the data set that you'd like to export
Select which Participants you want to export using the tick boxes next to their name
TIP: you can select all by using the select box at the top of the column.
Click on the 'Export' dropdown
Click 'CSV'
You will receive a confirmation message saying
CSV will appear in your downloadsTo navigate to your downloads inside Hanover;
From the menu, click 'Admin' and then 'Downloads'
Click the 'Download' button next to the relevant export
*Please note that for large datasets it may take up to 1-hour to appear in downloads.
Controlling What Data Is Included In A CSV Export 📩
Every field that you create inside your application forms can be included in a CSV export. In order to select this, when logged in as an Admin user;
From the menu, click 'Participants' and then 'All Participants'
Use the filters to get the data set that you'd like to export
Click the '+' on the data table
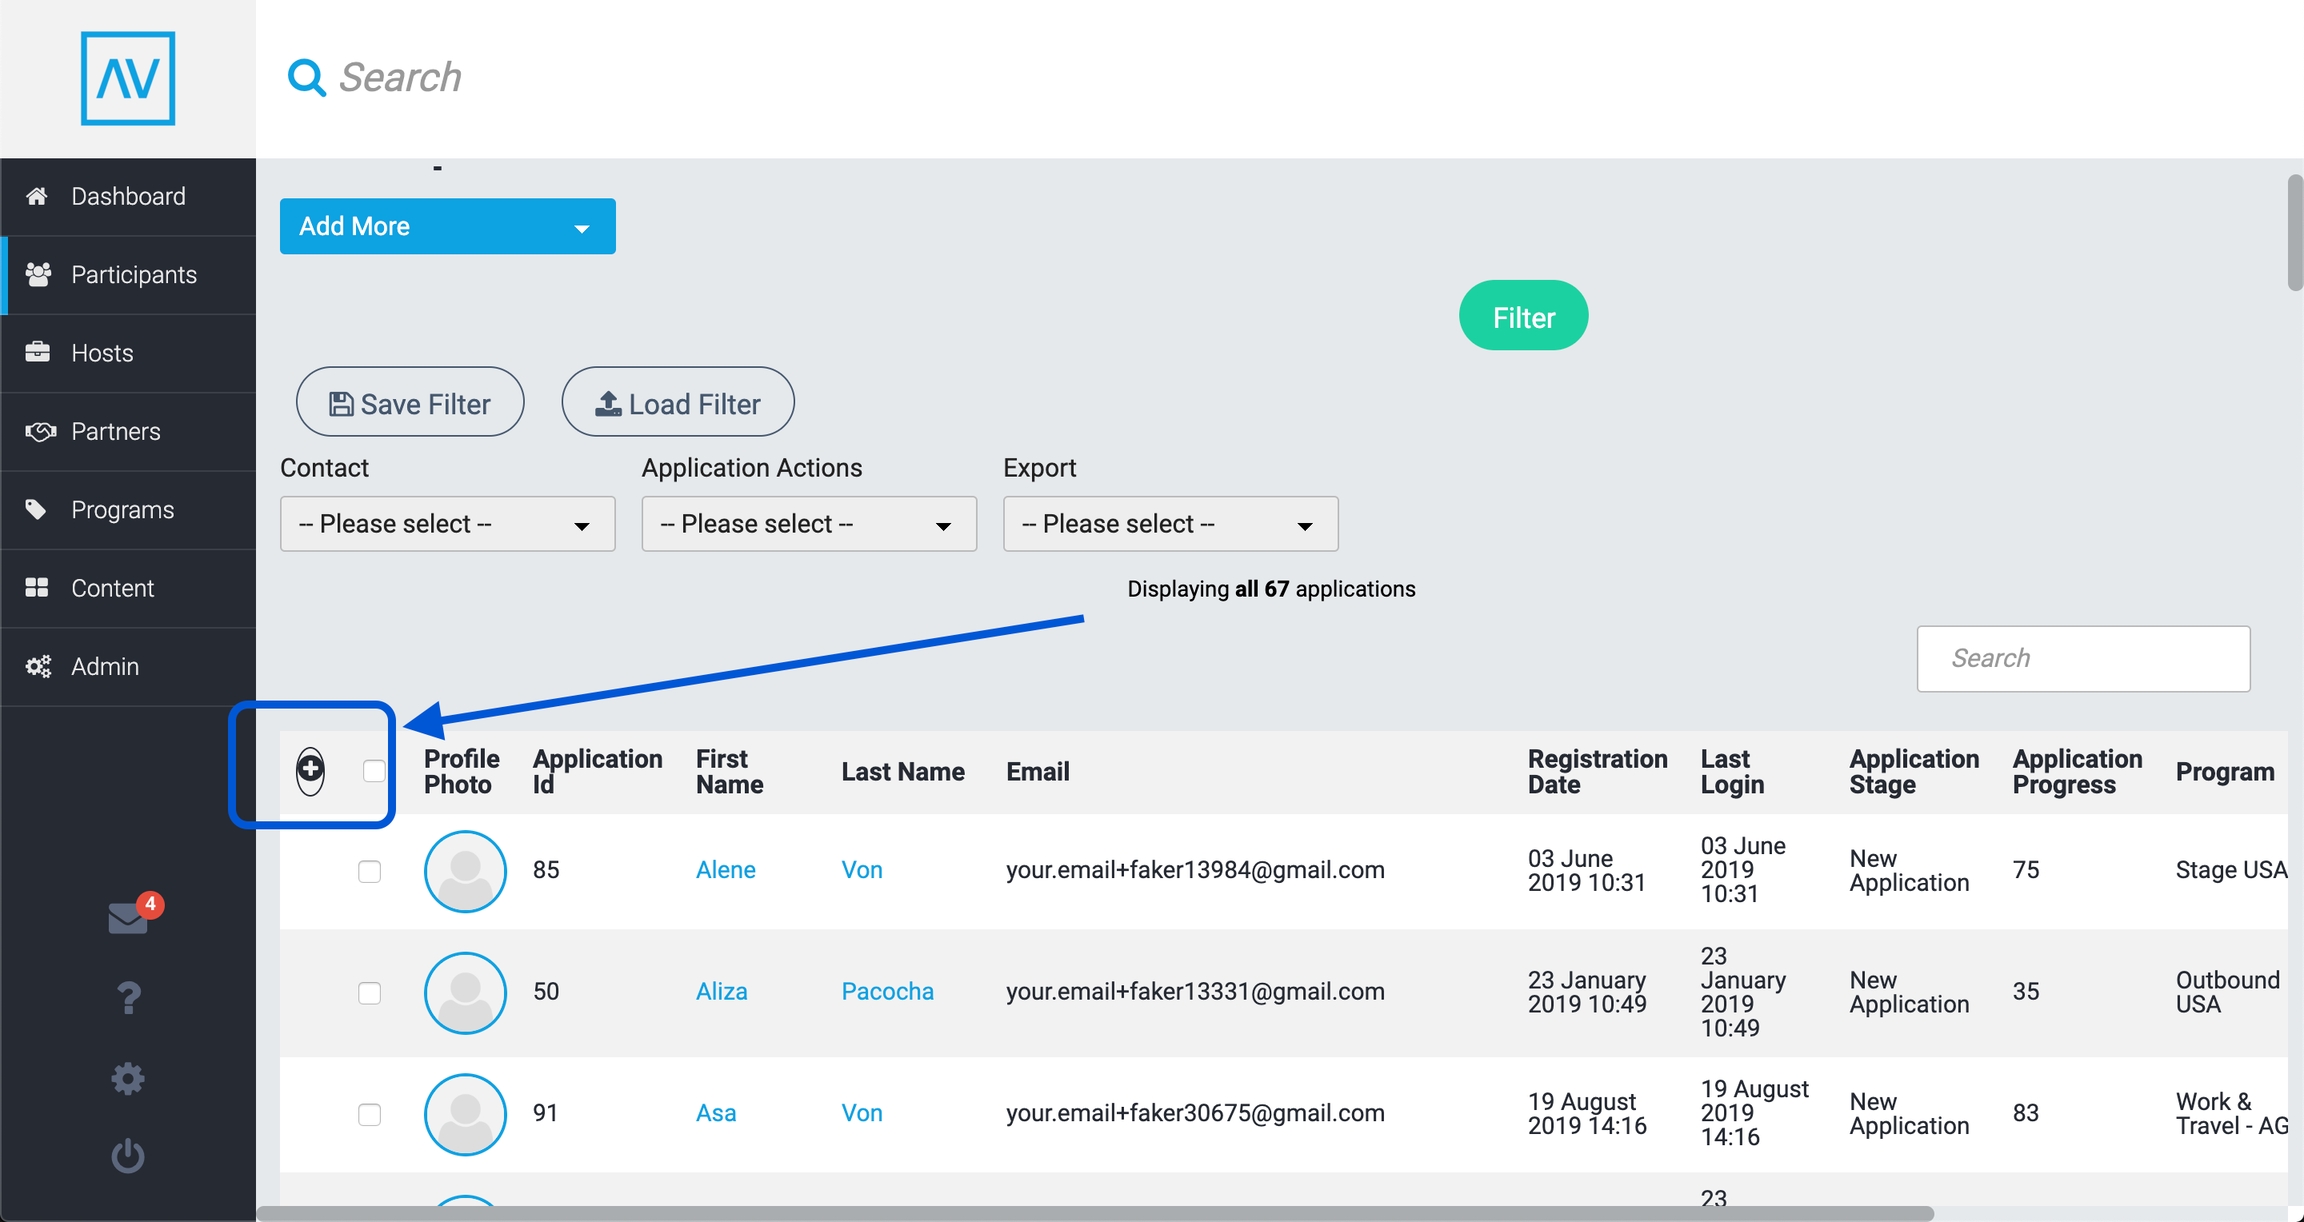
Use the tick boxes to select which fields you would like to be shown in the data table
TIP: you can drag and drop to reorder the columns
Click 'Save'
The data table will now show the selected columns and data
Follow the steps above to export this data to a CSV
TIP: save this view as a 'filter' so that you can get the data table back in the same format in the future quickly
Last updated
Was this helpful?